Showing posts with label lemon. Show all posts

Thursday, 5 September 2013

crab and fennel pasta with chilli, anchovy and lemon pangrattato


A beautiful taste of late Summer.  Crab and fennel are a perfect match and great with pasta.  Top this with a lovely chilli, anchovy and lemon pangrattato and a scattering of herbs and you have a dish ideal for alfresco dining enjoying the last of the Summer sun.  

Pangrattato is Italian for breadcrumbs - fried up with a bit of olive oil to top your pasta or risotto dishes - and a much cheaper alternative to Parmesan.  Crab and any kind of fishy pasta does not work with Parmesan anyway it just seems to 'clash' and become a bit cloying.  The pangrattato adds a crunchy, spicy bit of texture which works well against the soft, delicate pasta flavours.  

Let me know how you get on - I hope you enjoy - this is one of my favourite pasta dishes.  

preparation time:  10 minutes
cooking time:  15-20 minutes
serves 2-3 

recipe by:  chip butties and noodle soup 

crab and fennel pasta with chilli and lemon pangrattato


ingredients:

100-170g cooked white crab meat - I used fresh Cornish white crab meat, but tinned is also fine.
1 fennel bulb - chopped/sliced - I cut my in chunky, lengthways slices
1 clove garlic - crushed
400g chopped tinned tomatoes
1 tsp fennel seeds
2 tbs olive oil 
200g dried pasta - I used spaghetti 
handful of chopped fresh herbs - a mix of basil and parsley works really well here
salt and pepper to taste

for the pangrattato:

100g white breadcrumbs (whizz up in food processor or tear/chop up - I left mine quite chunky)
2 tbs olive oil
3-4 anchovies
1 tsp chilli flakes
zest of 1 lemon 

method:

  1. heat 2 tbs of olive oil in a pan, add your fennel seeds and garlic and fry for a minute or two before adding your chopped fennel.  
  2. cook for about 5 minutes until your fennel has softened then add your tinned tomatoes.
  3. simmer and let your sauce reduce for about 10 minutes or so to make sure the fennel has softened well.  Add a splash of water if it looks like it may be drying out.
  4. add your pasta to a large, salted pot of boiling water and cook until al dente (about 10 minutes but check by tasting a bit to see if it's ready).  
  5. while the pasta and sauce are cooking fry off your breadcrumbs/pangrattato with 2 tbs olive oil, anchovies, lemon zest and chilli flakes until crisped up and lightly golden.  
  6. when the pasta is done, drain and add to the pasta sauce along with your cooked crab meat - stir until well mixed - this also helps the sauce stick to the pasta as the starches are released from the stirring.  
  7. check for seasoning and finish off with the chopped fresh basil and parsley, a squeeze of lemon juice and a large sprinkling of the pangrattato.  Enjoy! Preferably outside, in the late Summer sun :-) 

As always your comments are most welcomed.  I would love to know your thoughts and if you try any of my recipes.  Happy cooking, and thanks for stopping by.  


Cooking with Herbs

I have entered this recipe into 


JWsMadeWLuvMondays

Four Seasons Food

and Four Seasons Food hosted by Delicieux and Chezfoti

Wednesday, 7 August 2013

Brighton Blue Cheese Polenta with Braised Spring Onions and Spinach


Brighton Blue Cheese Polenta with Braised Spring Onions and Spinach


As part of my #EatDrinkSussex series I have been developing some recipes using a selection of Sussex cheeses from La Cave a Fromage in Hove, East Sussex.  The Brighton Blue - a semi-soft cows milk cheese - made by High Weald Dairy was next on my list.  Brighton Blue was a recent winner of a bronze medal at the International Cheese Show in Nantwich, which is not surprising news.  The Brighton Blue is a wonderfully mellow blue cheese, with a touch of saltiness and sharpness.  The piquancy develops as it matures and the blue veins become stronger in colour and flavour over time.  It would be great on its with some crusty bread, or melting on a rare steak however I wanted to incorporate it into a recipe...

So wondering how to showcase the Brighton Blue and not mask it in other conflicting flavours was my main concern.  Inspired by the perfect match that is cheese and onion I came up with this recipe for Brighton Blue Cheese Polenta with Braised Spring Onions and Spinach.  Now cheese and onion is a match you cannot argue with, so I did not want to mess around with the ingredients too much. The resulting dish is one I hope of simple, distinct flavours which I hope you will try and enjoy.

I made my polenta from scratch, stirring away for what seemed like ages to avoid the dreaded 'lumps' that can often be the case.  You can of course use instant polenta (which is part cooked) and therefore cut down your stirring and cooking time (and aching arms!).

The giant spring onions, one of my favourite seasonal vegetables, are simply braised in butter and water and become soft and sweet in the cooking process.  This sweetness contrasts well with the tangy, salty Brighton Blue polenta and the dish is finished off with some wilted spinach and more Brighton Blue crumbled on top of the finished dish.  A grating of lemon zest added to the the dish at the end adds a citrus zing and freshness to cut through the fattiness of the cheese.

A good variation of this recipe if you don't fancy making the polenta would be to serve the braised onions, spinach and Brighton Blue cheese on a big doorstep slice of toasted sourdough - delicious.  I hope you enjoy this recipe and try it out.  Let me know how it goes... 


Brighton Blue Cheese Polenta with Braised Spring Onions and Spinach

serves 4 as a side dish or 2 as a main course 

preparation time:  5 minutes
cooking time:  40 minutes

ingredients:

150g Brighton Blue Cheese
1 cup polenta (fine cornmeal)
4 cups water
4 large spring onions/salad onions (or 2 regular sized bunches of spring onions)
200g spinach
zest of 1 lemon
20g butter
salt and pepper

method:
  1. preheat the oven to 180C 
  2. place your spring onions in a roasting tin (if using the large spring onions slice in half) and dot with the butter, season with salt and pepper, add an inch or so of water to the pan to help steam the onions.  
  3. place the onions in the oven and leave to cook while you get on with the polenta - this should take about 25-30 minutes 
  4. bring a pan of salted water to the boil then add your polenta in a steady stream whisking all the time to avoid lumps
  5. keep stirring regularly for about 25-30 minutes over a gentle heat until you have a creamy, smooth polenta.  The stirring is what creates the creaminess as it helps release the starches in the cornmeal - and also stops it burning on the bottom of the pan!
  6. when the polenta is done turn off the heat and add half your Brighton Blue cheese and stir it in.
  7. check the polenta for seasoning then leave covered to one side whilst you wilt your spinach in a pan with just a splash of water.
  8. next check your onions are softened and then remove from the oven - now everything should be done and you are ready to plate up 
  9. spoon/pour your polenta onto a large serving platter followed by the spinach and then the spring onions.  
  10. finish the dish with the rest of the Brighton Blue crumbled on top and the grated zest of a lemon - serve immediately.  

Brighton Blue cheese supplied by La Cave a Fromage


You can follow La Cave a Fromage on Twitter

#EatDrinkSussex is hosted by chip butties and noodle soup and highlights Sussex food and drink produce.  If you would like to feature on #EatDrinkSussex or have any suggestions please either leave a comment on the blog or contact me via Twitter and I will be in touch.   


I have entered this recipe into Javelin Warrior's Made with Love Mondays over at Cookin w/ Luv

JWsMadeWLuvMondays

Friday, 19 July 2013

The Big Summer Salad


My Big Summer Salad is a big bowl of Summery, green beany, roasted peppery, salady goodness. Just throw together a selection of your favourite vegetables for this healthy and quick big salad.  
The weather and the green beans were the inspiration for this salad.  I wanted to use the beans in something more than a usual veggie accompaniment.  They are in season right now and I think a lovely addition to this salad.  

This is barely a recipe at all as it's so simple.  It's more a starting point for you to experiment and play around with the flavours and ingredients you want in your Big Summer Salad - just throw together your chosen selection of vegetables and you're almost there.  Perfect for this hot weather when you don't want to spend ages preparing a meal.  It's also great for using up fridge leftovers - I had some leftover roast chicken and peppers which I added to the mix, but you could use whatever you have that needs using up.  It would be really good with tuna or boiled eggs for an different take on the traditional Nicoise salad.  

The ingredient amounts are approximate and you can obviously leave out what you don't like, and add more of what you do. All you need to finish it off is dress with a few glugs of olive oil, the juice of a lemon and chopped fresh herbs.  The dressing really brings all the flavours together with a fresh citrussy zing!  

Let me know how you get on, and what you add to your Big Summer Salad.  

preparation time:  5-10 minutes

serves 2-3 as a main meal 

ingredients:

2 handfuls green beans
2 roasted peppers 
3 tomatoes 
handful of grated/finely chopped red cabbage
2 handfuls watercress/salad leaves
leftover chicken breast (optional)
juice of 1 lemon
few glugs olive oil
handful of chopped coriander/mint
salt and pepper to taste

method:  
  1. top and tail the green beans then blanch in salted boiling water for 2-3 minutes.  Drain and run under cold water
  2. chop all your vegetables how you want them (I left the beans whole and roughly chopped everything else which gave it a somewhat 'rustic' charm) and add to a big bowl
  3. toss together with the juice of one lemon, a few glugs of olive oil, fresh chopped coriander/mint and salt and pepper to taste
  4. serve with a big chunk of fresh bread and butter if you like and enjoy.  

A perfect accompaniment for a BBQ or Summer buffet.  Other dishes of mine that would go well with this to make a bigger Summer buffet lunch or dinner are my: 


I have entered The Big Summer Salad onto:

Cooking with Herbs

July's entry hosted by Karen at Lavender and Lovage

I am also entering this recipe onto: Four Seasons Food hosted by Delicieux and Chezfoti to go with their BBQ and BBQ sides theme.


Four Seasons Food


I have also entered this recipe into Javelin Warrior's Made with Love Mondays over at Cookin w/ Luv

JWsMadeWLuvMondays

Sunday, 14 July 2013

roasted butternut squash, caramelized lemon and berbere houmous


I love houmous.  It's perfect for a quick snack on fresh bread, or as part of a larger mezze meal or BBQ accompaniment.  This recipe is packed with flavour and has influences from Africa with the traditional Ethiopian spice mix berbere.  This would be great with some warmed flat bread and smokey BBQ-ed lamb or falafel.  Check out this great falafel recipe on how to eat properly - by the brilliant Yotam Ottolenghi and Sami Tamimi from their book Jerusalem

preparation time:  10 minutes
cooking time:  20-30 minutes

ingredients:

400g tin cooked chickpeas 
1 medium sized butternut squash
1 head of garlic
1 lemon (I used fresh lemon but a preserved one would be lovely too)
8 tbs olive oil
4 tbs plain yogurt 
2 tbs cumin seeds
1 heaped tsp berbere spice mix 
small bunch coriander/parsley chopped (keep a little back for garnishing)
salt and pepper to taste

method:
  1. preheat the oven to 200C.
  2. wash and roughly chop your squash - you can peel it if you want but I didn't bother as it softens down in the cooking process.  
  3. add your squash to a roasting pan with the head of garlic.  Leave this unpeeled as it helps protect the garlic inside and produces wonderfully sweet and soft roasted cloves.  Add the cumin seeds and toss the squash and garlic in about 4tbs of your olive oil.  Roast for 20-30 minutes.  It's done when the squash is slightly caramelized and a knife pierces it easily.  
  4. about 10 minutes before the end of the cooking time add the roughly chopped lemon - so it can soften and caramelize too.
  5. when it's cooked and slightly cooled remove the skins from the garlic cloves then add to a food processor with the squash, lemon, chickpeas, yogurt, remaining olive oil, chopped herbs, berbere spice and salt and pepper.  You may need to whizz this up in a few lots depending on how big your processor is.  This would also work well with a hand held blender.  
  6. serve garnished with more herbs and a drizzle of olive oil. Enjoy!


I am also entering this recipe onto: Four Seasons Food hosted by Delicieux and Chezfoti to go with their BBQ and BBQ sides theme.


Four Seasons Food


Cooking with Herbs

July's entry hosted by Karen at Lavender and Lovage


Friday, 5 July 2013

rhubarb, rose and vanilla jam


This rhubarb jam flavoured with rose and vanilla is a combination of some of my favourite flavours and produces a wonderfully fragrant, tangy and Summery jam.  It is inspired by my trying to live a more self-sufficient life and my plans for an imminent move to the country to rear goats (amongst other activities!) I have long been a maker of chutneys and pickles however jam making has somehow not become a part of my foodie repertoire.  Like my largely unpractised/covert pastry skills it is something I have avoided doing - blaming my lack of  high tech jam making kit, thermometers and special tongs.  However after making this jam things will change - the wrinkly jam/frozen saucer trick worked a treat and a jam not too runny or solid was produced.   Give it a go - what's the worst that could happen - except maybe a burnt, unusable mass of hot sticky rhubarb and a saucepan you have to throw away?

However you are more likely to produce a delicious, fragrant jam to hush those negative voices that ever doubted you and you will wonder why you had never tried jam making before - well that's the effect it had on me anyway!  So go on -  feel the jam making fear and do it anyway! I hope you enjoy and let me know how you get on...

recipe author:  chip butties and noodle soup 

makes enough for 4 450g jars
preparation time:  10 minutes
cooking time:  20-25 minutes

ingredients:

1kg rhubarb* (washed well and chopped into 2-3cm pieces)
1kg jam sugar (with added pectin)
juice and zest of 1 lemon
5-6 tbs rose water (or to taste)
1 vanilla pod (split in half lengthways)

*remember to discard any of the rhubarb leaves as these are poisonous and should not be cooked/eaten.

method:
  1. put a couple of saucers in the freezer ready for later when you need to test the jam setting point.  
  2. in a large pan (or preserving pan) add the rhubarb, sugar, lemon juice and zest, vanilla pod and rosewater.
  3. heat gently and stir until the sugar is dissolved.
  4. turn up the heat and boil for about 10 minutes until the fruit is soft - skim off any skum that rises to the surface.  
  5. to test for the jam setting point remove a cold plate from the freezer and spoon a small amount of jam onto it - leave for 30 seconds then push your finger through the jam.  If the surface of the jam 'wrinkles' it is ready - if not keep the jam on the heat and test at 2-3 minutes intervals.  You can also use a jam thermometer if you have such equipment - the setting point is 105C.  
  6. when the jam is ready carefully remove the vanilla pod and pour into warmed, sterilised jars and seal.
  7. store in a cool, dark place for up to 6 months and in the fridge after opening.     
  8. serve with tiny (as pictured) or normal size toast is also good.  

I have also entered this recipe into Javelin Warrior's Made with Love Mondays over at Cookin w/ Luv

JWsMadeWLuvMondays

Thursday, 2 May 2013

samphire and tomato salad


Samphire and tomato salad - a beautifully fresh and simple Summer salad with a great mixture of textures and flavours.  Works really well served with fish and chips I discovered but would go equally well with other fish dishes.  Inspired by a sunny weekend on the Kent coast in Ramsgate.

Samphire is an edible coastal vegetable - it can be foraged from coastal areas (if you know what you're doing!) but can also be bought in some supermarkets and fishmongers.  It has a fresh, salty, sea taste that can be bitter raw....taste a bit first to see if you like it and if too bitter blanch for a minute or 2 in boiling water before refreshing in cold water.  This should take the bitter edge off but still leave the lovely fresh taste.


serves 3-4 as a side salad

ingredients:

200g samphire (cleaned well in running cold water to get rid of any sand/grit)
200g tomatoes
2-3 spring onions
2-3 tbs olive oil
grated zest and juice of 1 lemon
pepper to taste (no salt as the samphire is already salty)


  • taste your samphire to check if it too bitter for you - if it is blanch for 1-2 minutes then refresh in cold water and drain.
  • mix all your ingredients together, season with pepper to taste and it's ready to serve
  • ...it really is that simple. 
  • would be great with fish and chips or simply cooked fish.  I hope you enjoy and let me know your thoughts....


I am also entering this recipe onto: Four Seasons Food hosted by Delicieux and Chezfoti to go with their BBQ and BBQ sides theme.  This would be great for a beach BBQ....


Four Seasons Food


I have also entered this recipe into Javelin Warrior's Made with Love Mondays over at Cookin w/ Luv
JWsMadeWLuvMondays

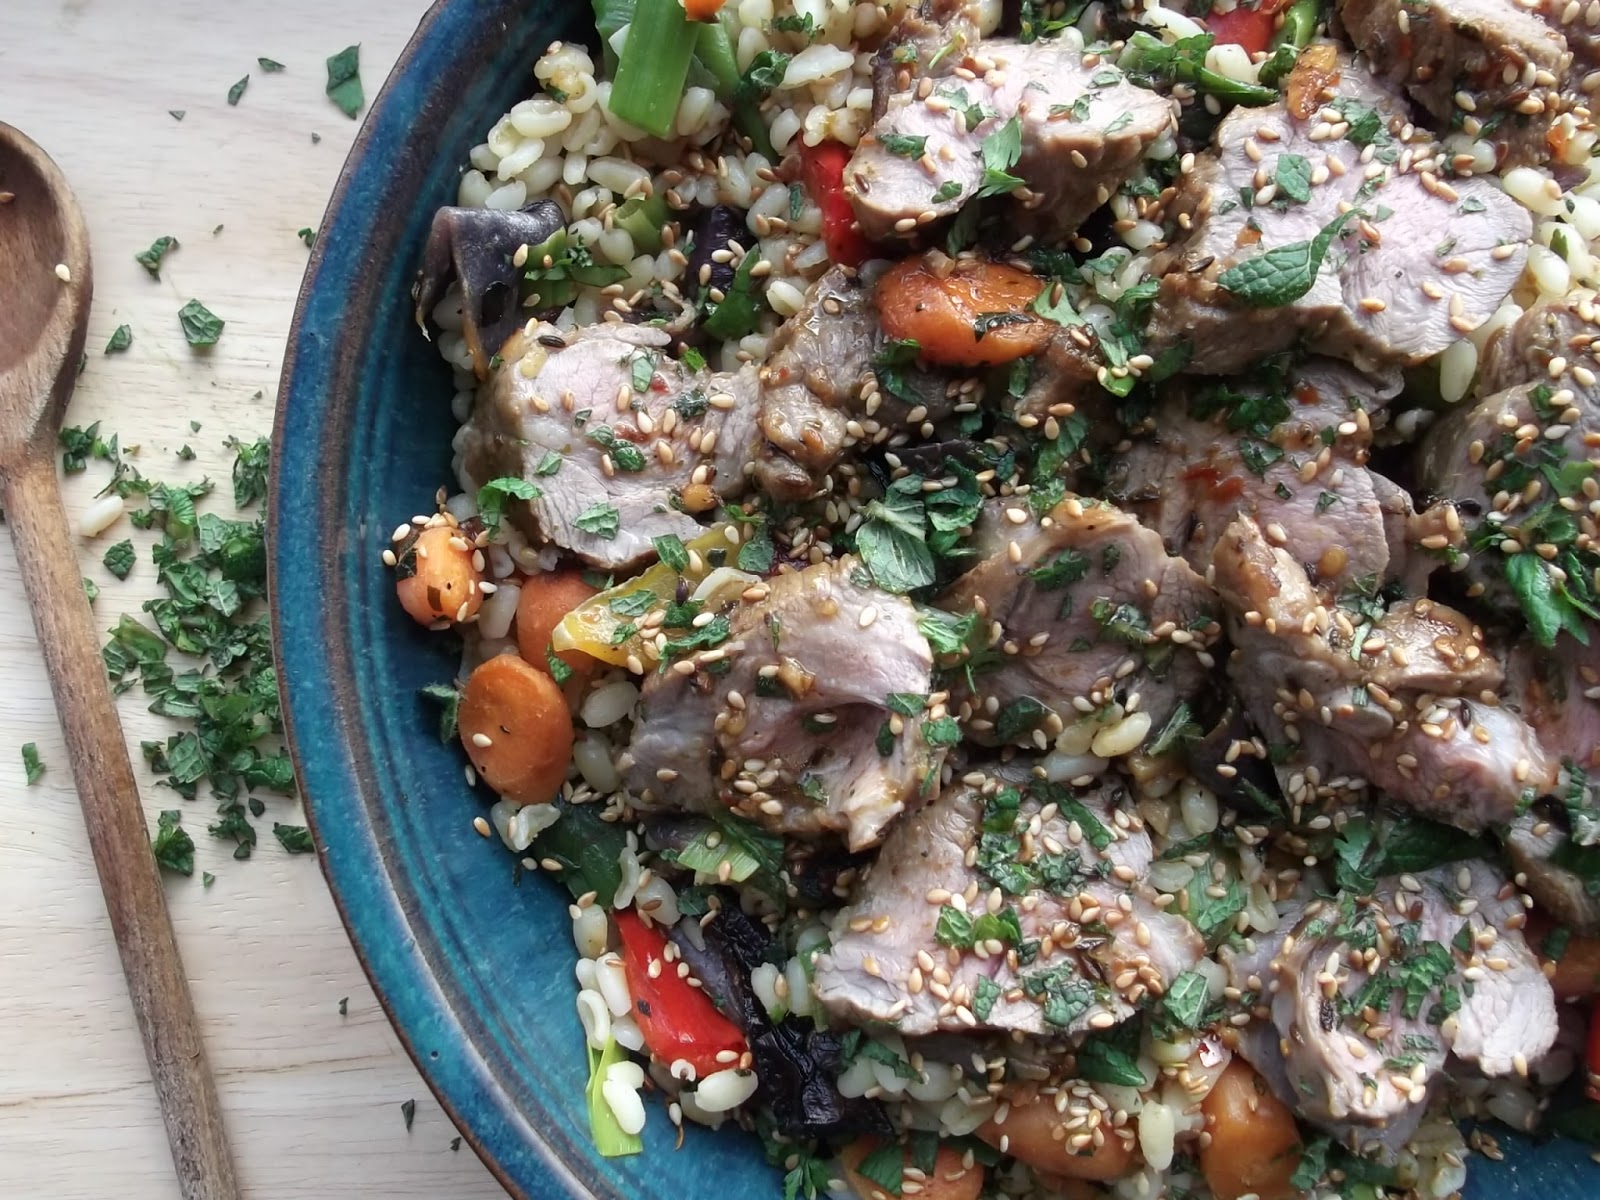
rose harissa lamb with roasted vegetable & grain salad


Rose harissa marinated roast lamb with roasted vegetable and grain salad.  A quick and easy lamb recipe with loads of interesting flavours - definitely influenced by the cooking of North Africa with the use of spicy harissa paste.  I am using my home made rose harissa but you can of course use a shop bought paste.

This is a dish that should not be served 'piping hot' as this will not bring out the flavours fully. When mixed leave to stand for about 20 minutes before serving.  This would be great as a main course on its own but would also be good as part of a tapas or mezze platter with other dishes.

serves 4 as a main or more as part of a mezze or tapas platter

preparation time:  1 hour-overnight (marinating time)
cooking time:  30-40 minutes

ingredients:
600g lamb neck fillet
2 tbs olive oil

for the marinade:
2 tbs rose harissa chilli sauce (or shop bought harissa)
zest of 1 lemon
2 bay leaves
3-4 cloves garlic

for the roast vegetable and grain salad:
200g quick cook wheat - I use this (bulgar wheat or cous cous would work equally well)
600g mixture of any of the following:
onions
peppers
carrots
sweet potatoes
aubergines
garlic
courgettes
2 tbs olive oil
salt and pepper to taste

to garnish:
2 tbs toasted sesame seeds (to toast just heat gently in a dry pan for 3-4 minutes until lightly browned)
chopped fresh mint
squeeze of fresh lemon juice

instructions:
  • put the lamb in a bowl with all the marinade ingredients - leave covered in the fridge for at least 1 hour, but preferably overnight.  
marinading the lamb

  • when ready to start cooking, and your marinading is done preheat the oven to about 190C
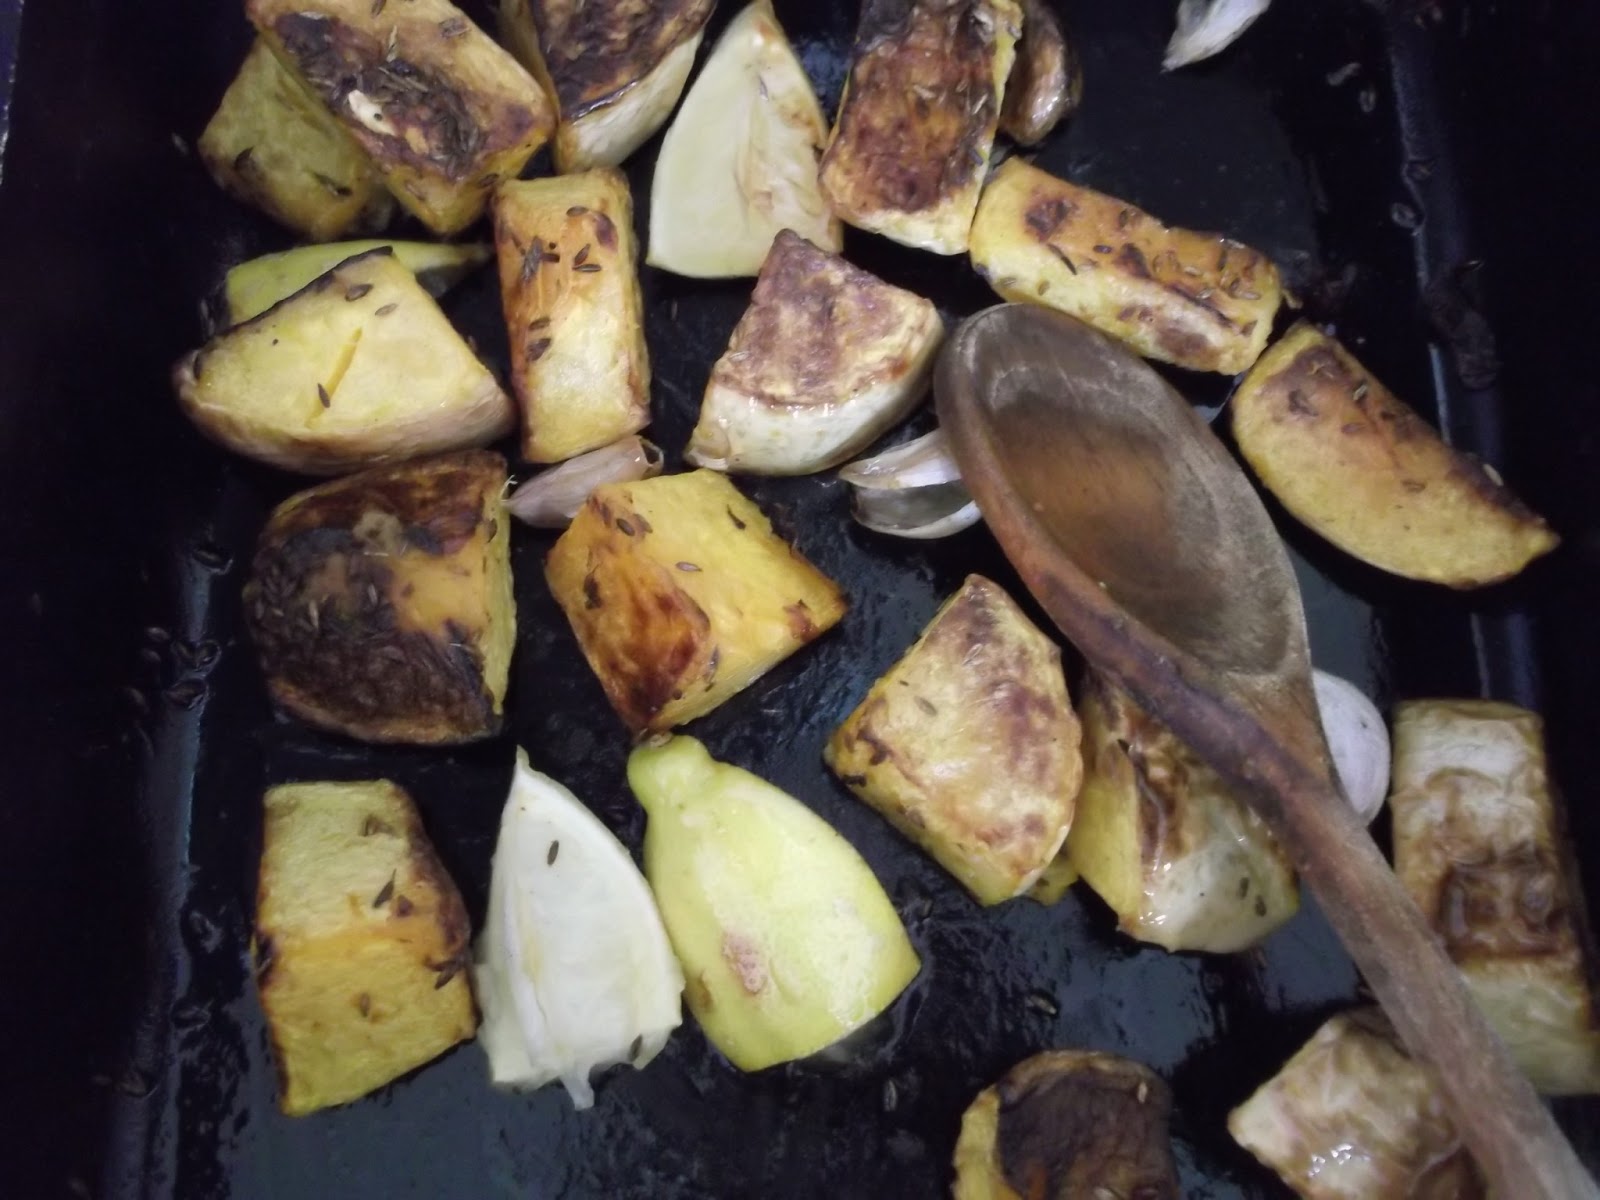
  • chop your chosen vegetables into similar sized chunks, mix with the olive oil, salt and pepper then put in a roasting tin and cook for about 20-30 minutes.  The vegetables should have softened and slightly browned around the edges.  
  • to prepare the lamb preheat a frying pan with the olive oil - when hot brown the lamb on all sides then place in a roasting pan with any leftover marinade liquid and roast for about 10 minutes (or until cooked to your liking)
  • while this is cooking prepare your quick cook wheat (cous cous or bulgar wheat) according to packet instructions.  When cooked drain and leave to one side. 
  • when the lamb is done leave to rest for at least 10 minutes 
  • next slice the lamb and mix with the wheat and roasted veg before garnishing with the sesame seeds and chopped fresh mint, finishing with a squeeze of fresh lemon juice. 
  • Enjoy with more rose harissa chilli sauce as I do if you like it even spicier!  
Rose harissa lamb with roasted vegetable and grain salad


rose harissa chilli sauce


Thursday, 6 December 2012

honey, walnut and cardamon baklava cake


An interesting combination of honey, walnut and cardamon in a polenta cake drizzled with a citrusy, sticky syrup.  Delicious :)  This recipe is inspired by the combination of baklava (a middle eastern/Mediterranean sweet) and a Jewish honey cake which is traditionally served at Rosh Hashanah.  This cake would make a great after dinner sweet with a black coffee (however I have also had it for breakfast -  all in the name of recipe testing....?!)


preparation time: 15-20 minutes
cooking time: 20-25 minutes

cake ingredients:
1 stick butter (at room temperature)
1 cup soft brown sugar
2 eggs
1/2 cup milk
1 cup crushed walnuts (this recipe would also work well with crushed pistachios, almonds, or hazelnuts)
1 vanilla pod/1 tsp vanilla essence
2 cups fine cornmeal/polenta
1 teaspoon baking powder
1/2 teaspoon baking soda
12 cardamon pods (seeds removed and crushed- about 1 tsp of seeds)
pinch of salt
syrup ingredients:
1 cup sugar
2 tbs honey
1 cup water (or mix of water and orange/lemon juice)
vanilla pod (left over from removing the seeds for the cake mixture)

  • add the sugar and butter to a bowl and beat with an electric whisk for about 3-4 minutes - until it is lighter in colour and well combined

  • add eggs and milk and whisk until combined - it may curdle but don't worry as that will change when you add the polenta/corn meal


  • fold in the cornmeal/polenta, baking powder, baking soda, vanilla, crushed walnuts, crushed cardamon seeds and a pinch of salt - mix until just combined - you don't want to over mix as this will produce a heavy cake.
  • pour the cake batter into a greased/lined baking dish/tin.  I used a rectangular dish approx 10x14 inches.
  • smooth over the top of the cake and bake for about 20 minutes until it is golden and feels firm to the touch
  • while the cake is baking add all the syrup ingredients together and bring to the boil for about 1 minute - or until the sugar is dissolved.  Be careful - hot sugar syrup splashing onto skin NOT good! Carefully take off the heat and leave to one side until the cake is done.   
  • when cake is removed from oven carefully pour syrup all over the cake then leave to cool before slicing into squares.